|

How to upload files
and create folders with
WS_FTP Pro 6.0

Click
here to obtain the latest version
Click
on the images below for a full view
Step
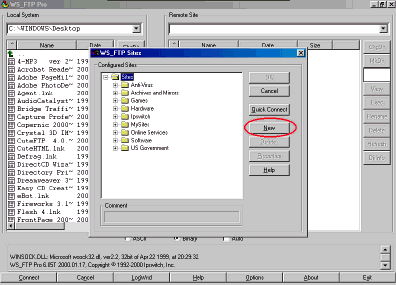
1: Select a folder on the opening screen and
click on "New", and enter into those boxes the
information that was emailed to you from our office and
click the OK button.
Step
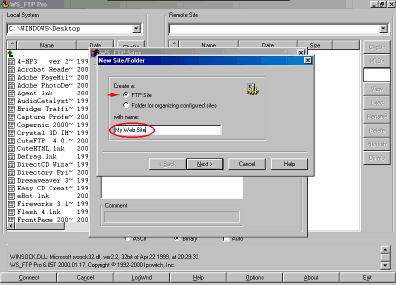
2: Here you will select "Create a FTP Site"
and give a name to your site's location. enter into these
boxes the information that was emailed to you from our office
and click Next>.
Step
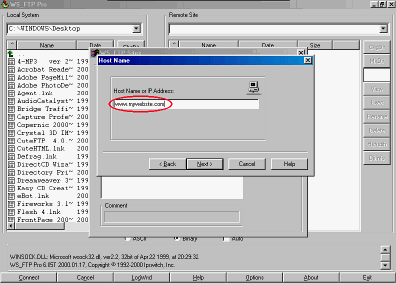
3: Here you will insert your domain name, or
the IP address that was emailed to you from our office and
click Next>.
Step
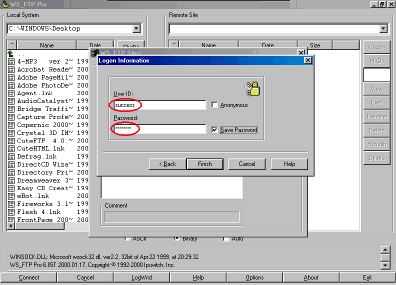
4: Here you will enter the user ID and password
that we gave you and click Finish.
Step
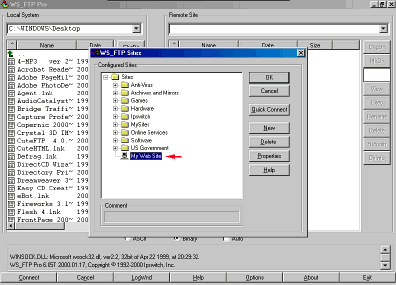
5: Now your connection to your site will appear
in the directory tree. Click OK to connect to your website
on our server.
Step
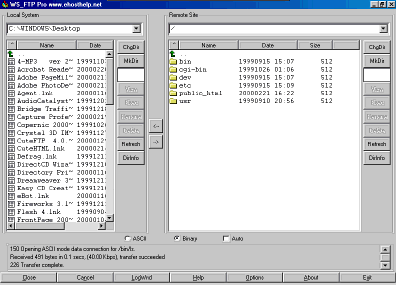
6: This is how the screen will look after you
have successfully logged onto your website The left window
pane will show the folders and files on your local hard
drives, and the pane to the right shows your folders and
files on our webserver.
Step
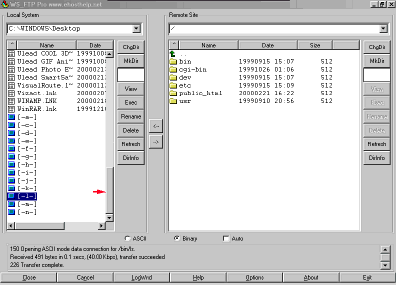
7: Use the vertical slide bar on the left pane
to navigate to the folder which contains your web pages.
Step
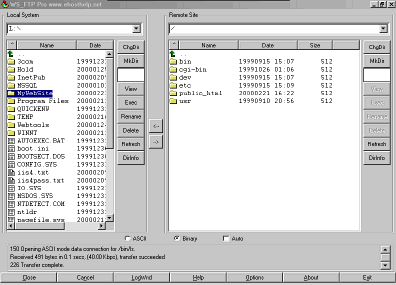
8: Find the folder that contains your web pages/files
and double click on it.
Step
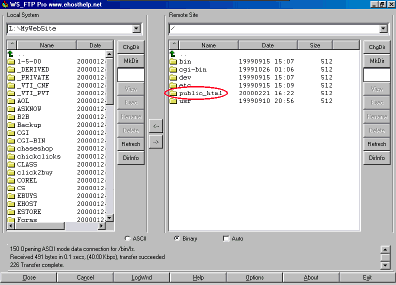
9: You will now see all the files that
are in your local web folder. The highlighted folder below...
"public_html" is the folder that you will use
to upload your webpages to our server, and to create folders
within.
Step
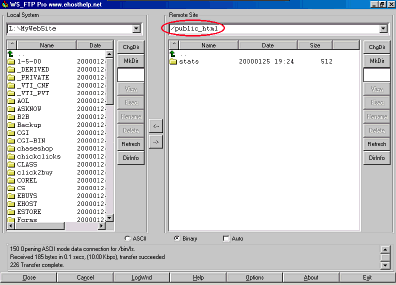
10: After you double click upon your
"public_html" folder, your screen will look like
this. NOTE:
The pane to the upper right shows /public_html in the location
field.
Step
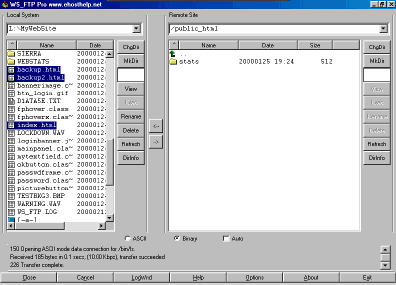
11: On the left window pane, select the
files you wish to upload to your website (CTL+Click to select
several).
Step
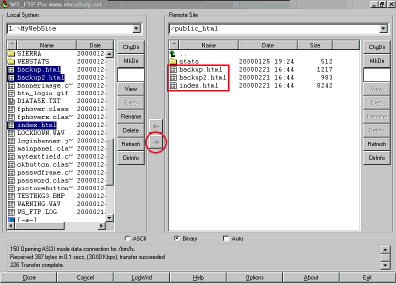
12: Click upon the "->"
button that is almost in the centre of the screen to begin
the upload process. The files that you have selected on
the left pane will then appear on the right pane (your website
on our server).
Step
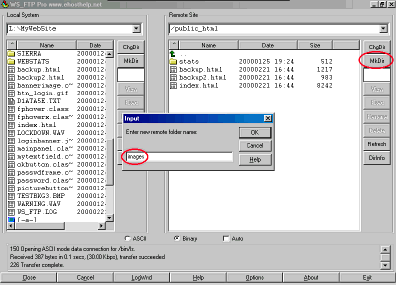
13: To create a new folder, click upon
the "MkDir" button on the right side of the left
window pane, and enter the new folder's name in the input
box as shown below.
Step
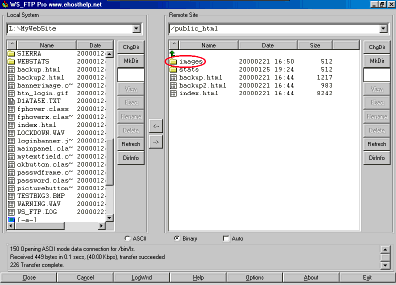
14: Your new folder will appear on the
right pane, and just double click on it to open it.
Step
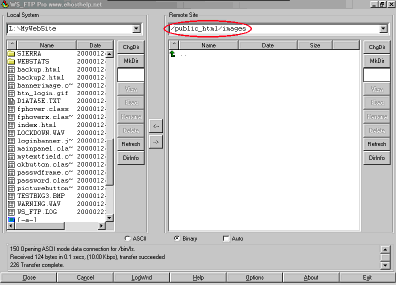
15: Above the right pane in the location
bar, it will show "/public_html//images/esupport/images-ftp".
Step
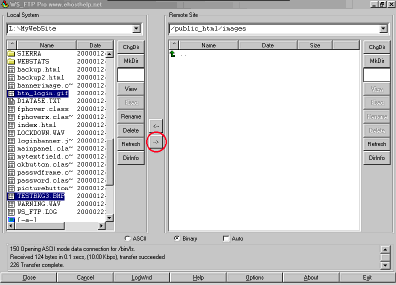
16: Now you can select (CTL+Click to
select several) the graphics you want to upload to your
new folder, and just click on the "->" button
as you did before to upload them.
Step
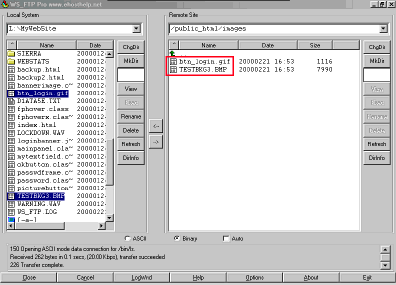
17: After you click the "->"
button, your uploaded files will appear in the folder that
you previously created.
Step
18: To disconnect from your website,
simply click on the "Close" button in the lower
left corner.

|


